Set up your SoriTrading server
You'll rent a small computer that stays online around the clock and install SoriTrading on it. Follow the screenshots and click whatever is inside the red boxes. Tap any picture to see it larger.
1. Sign up for AWS about 5 min
Click Create a Free Account
AWS is Amazon's server rental service. This is where you rent the computer.
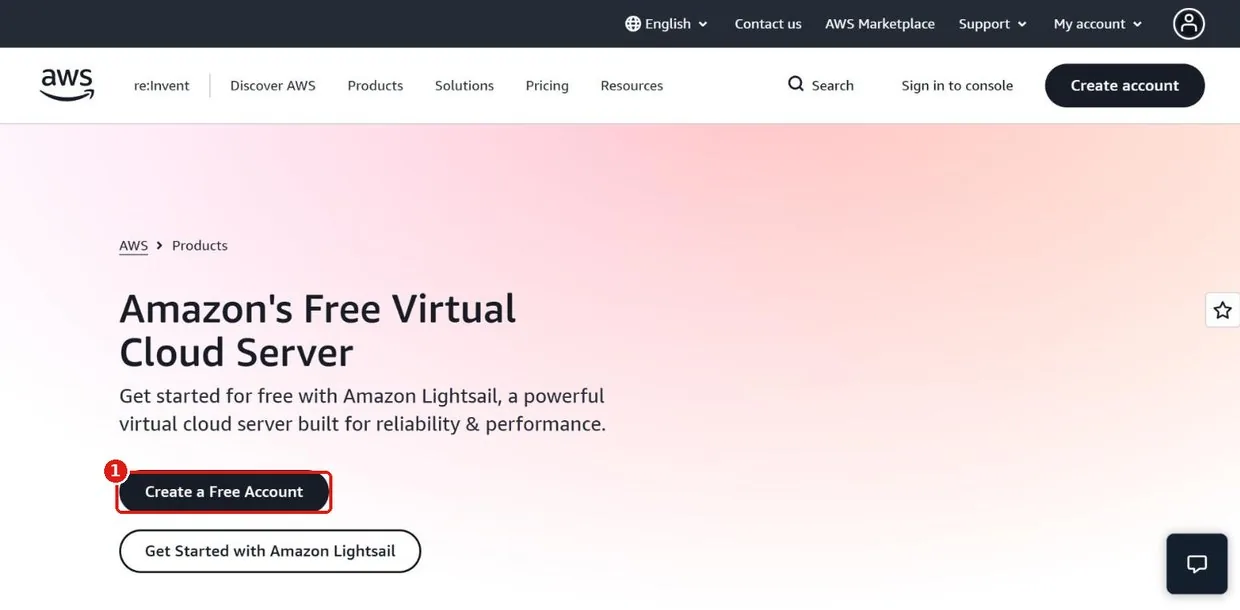
Already have an AWS account? Don't sign up again — just sign in, skip to step 4 and carry on.
Enter your email and a name
Use an email address you actually check, and pick a name you'll recognise later.
2AWS account name → anything you like
3Then click Verify email address
Signing up needs an email address, a card that works for international payments, and a phone for verification. AWS will ask for a verification code, a password, your address and card details one screen at a time — just follow along.
Choose the free plan if you're offered one
Partway through sign-up AWS may ask you to pick between a free and a paid plan.
If you never see this screen, that's fine. Carry on to the next step.
2. Rent the server about 5 min
Choose where the server lives and what runs on it
This screen decides which country your server sits in and which software it starts with.
2Platform (what to install) → Linux operating system
3Blueprint (which version) → Ubuntu 24.04 LTS
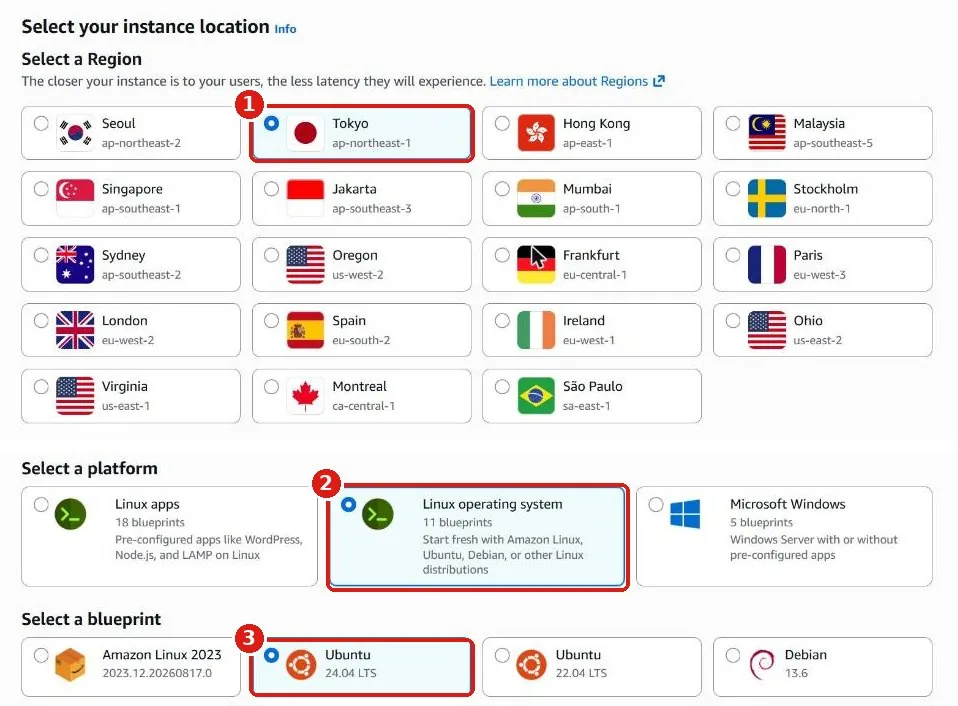
Pick the city closest to the exchange you'll use. Not sure? Leave it on Tokyo, or contact support.
To change it later you'd have to create a new server.
Choose the server size
This sets how powerful the server is and what it costs each month.
2Choose Dual-stack
3Choose $7 USD per month
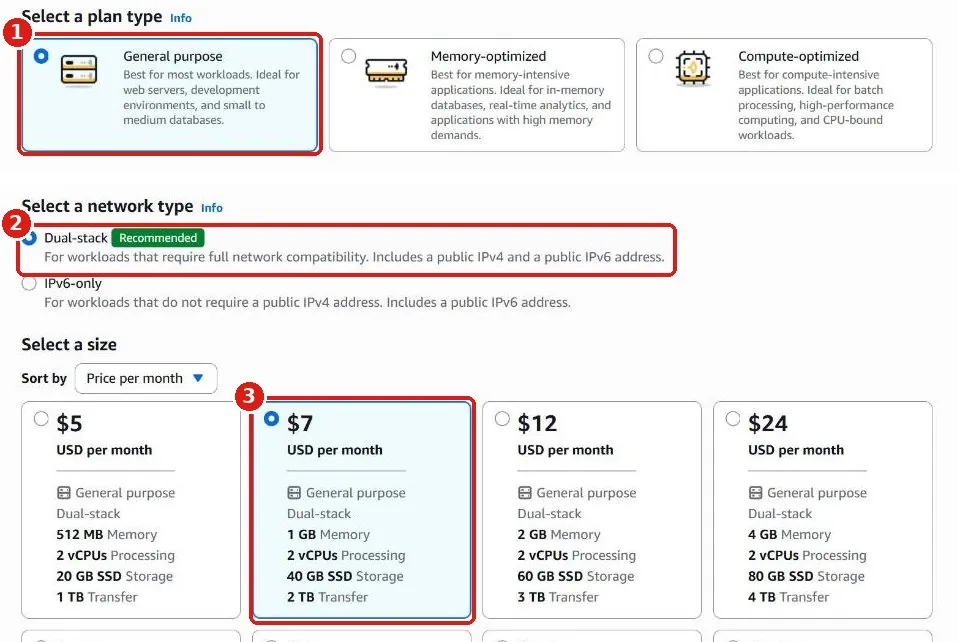
Name it and create it
Give the server a name, then actually create it.
soritrading-agent exactly2Click Create instance
Leave everything else exactly as it is.
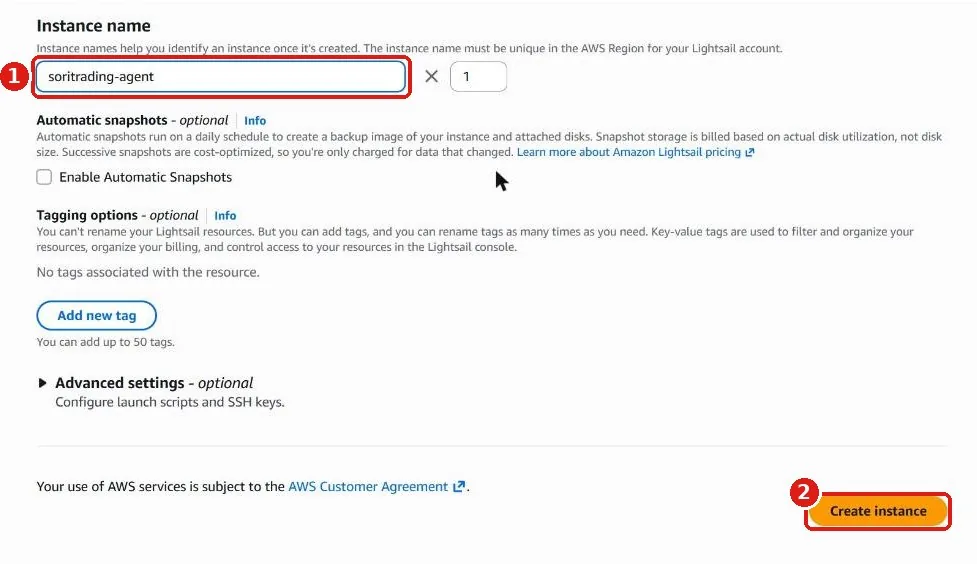
Adding another server later? Give it a different name, like soritrading-agent-2.
3. Install SoriTrading about 3 min
Check it's running, then connect
Once the server has finished starting up, check its status and open the connection window. This takes a minute or two.
2Click the Connect using SSH button
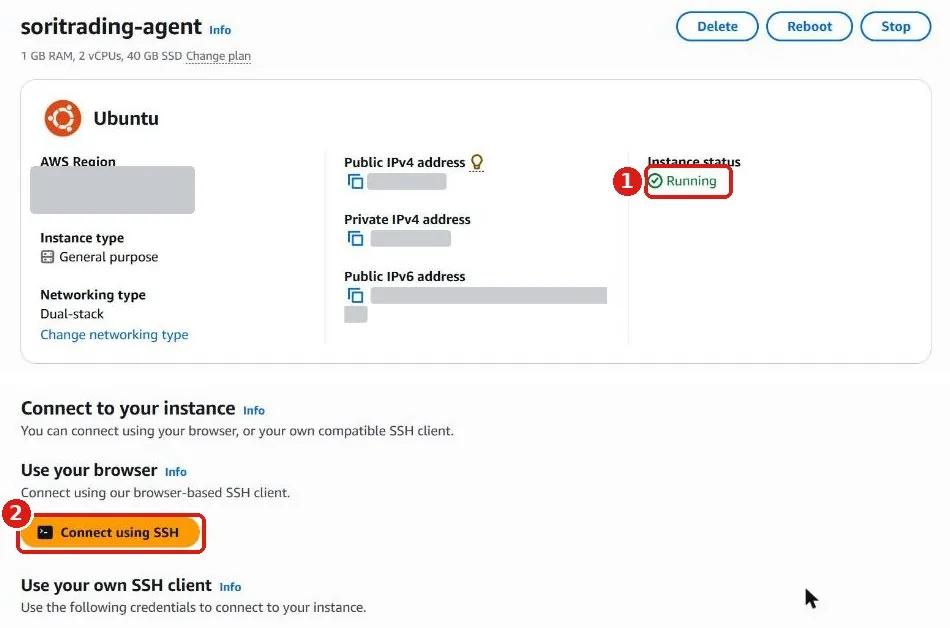
Nothing to install — a black window opens in your browser. If it doesn't open, click the pop-up blocked icon at the right of the address bar and allow it. The grey block is personal information we removed.
Get your command and paste it in
You'll fetch a command that belongs only to you from SoriTrading, then paste it into the black window. You're switching between two windows here, so take it slowly.
2Go back to the black window and click Paste into terminal at the bottom right
3When the text appears on the blinking line, press Enter
Text will start scrolling. That's normal. It takes a minute or two — don't close the window until it stops.
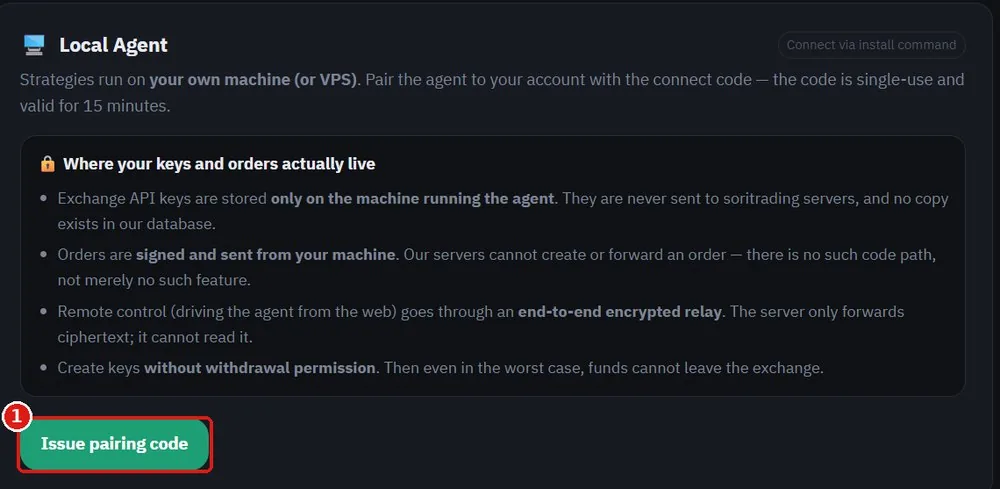
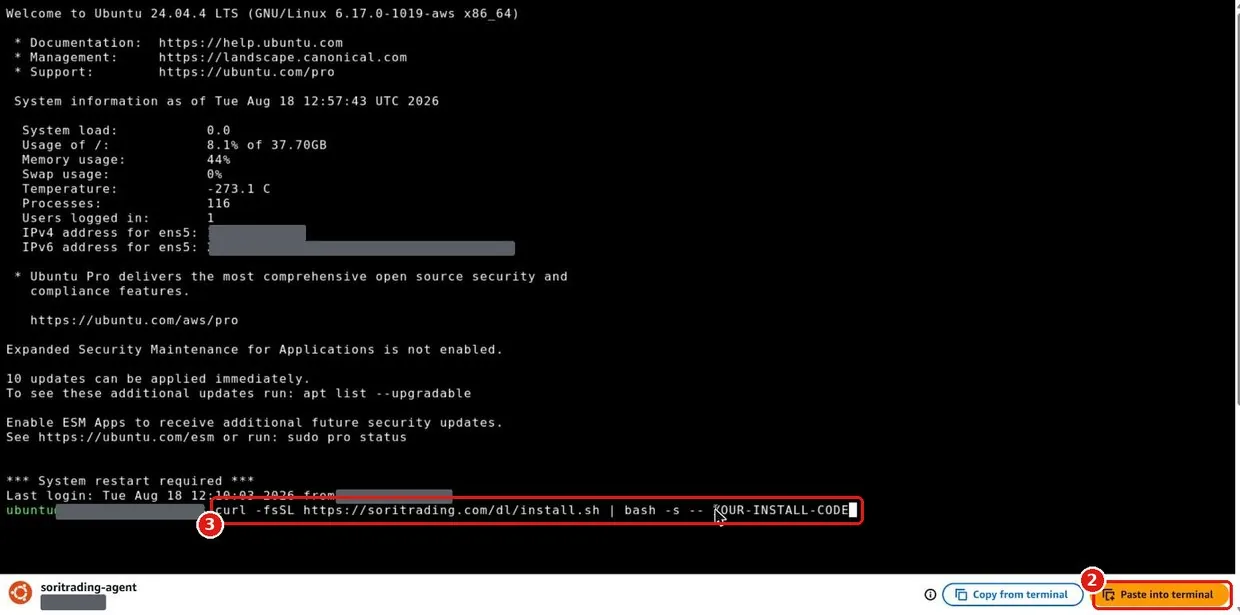
The command contains information tied to your account and stops working after 15 minutes. Don't send it to anyone.
Check that it worked
When the scrolling text stops, the install is finished. Go back to the Agents page in SoriTrading. If your new server appears near the bottom marked Online, you're done.
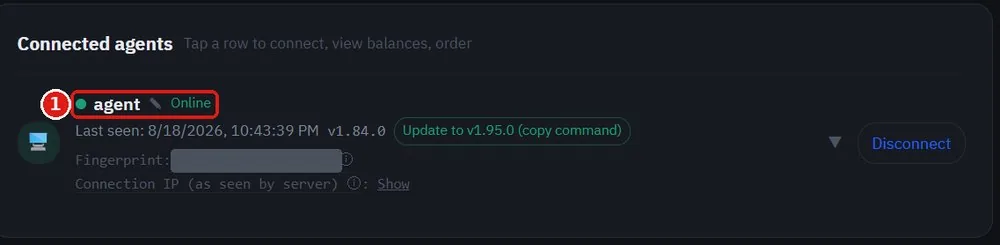
You can close the black window now. SoriTrading keeps running on the server.
What's next — open Paper Trading from the top menu in SoriTrading and try it with pretend money first. Move to Live once you're comfortable.
If it doesn't say Online
Wait a minute and refresh. If it still doesn't appear, check the black window for red
error text, and if more than 15 minutes have passed, issue a new pairing code and repeat step 8.
If you closed the window, or want to continue later
The server stays there once it's created. You don't need to make another one.
Sign in to AWS Lightsail, open Instances and click soritrading-agent.
That's the step 7 screen — carry on from there.
How to stop and cancel (stopping the charges)
In AWS Lightsail, open Instances, click soritrading-agent,
then click Delete at the top right and confirm.
Stop does not end the charges. Only Delete does. Deleting also erases everything on the server, so move anything you need off it first.